
We’re all familiar with boiling chicken from room temperature. It’s as easy as poaching the poultry in a protein-rich juice (stock) and let simmer until fork tender, (or fork shredder in my own terms).
But how differently would any step be if the cuts were frozen rather than warm? I mean chicken is no cheap beef we can close our eyes and gamble with, so what would be the right option to start off from frozen?
In this article, you’ll learn everything you ever wanted to know about boiling chickens from frozen. Without wasting time, lets get started.
How to boil frozen chicken
Boiling whole chicken or chicken parts from the frozen state is possible, according to the United States Department of Agriculture (USDA).
But obviously, you’re already familiar with this information since your concern is “how to boil chicken from frozen” and not whether or not boiling frozen chickens is possible or advisable.
So congrats, you’re done with the first step, now it’s time to understand how to properly boil chicken from the frozen state in order to reap optimal tenderness, most juice and most flavor.
We’ve compiled a complete guide below covering how to do so using different types of chicken parts from breasts, thighs, wings and even whole. So pick yours, sit back, relax, and carefully follow through!
(You know,… maybe i was wrong, and you actually never knew that frozen chicken parts were completely safe to boil on the stovetop — prior to me telling you in the earlier paragraph. But at least now you’re aware and you can even learn more here!).
How to properly boil frozen chicken
Things you need:
Chicken stock plenty enough to cover the entire chickens and slightly higher; having more stock than needed is always better! If you don’t already know how to make a chicken stock, or worse still, if you don’t already have a chicken broth recipe you call your own, and you’re a mother, and you have three kids, and you’ve been online for the past five years, then clearly, you need a scolding from Thewisebaker team! Stock is actually one of the simplest things you can ever make, and with three, four, or five recipes from different sources, you can easily personalize and develop your own version! So wait no more and start experimenting!
A pot, container, or pan large enough to contain all the chickens.
Seasoning of your choice.
and lastly, rock hard frozen chicken (whole) or individually separated parts — it’s not like we’re cooking frozen goat head are we?
These above, are the basics. For the extras, we’ll discuss them as we proceed with the steps;
Steps to make a memorable boiled chicken
-
Step 1: Pour the broth into the pot or pan and add the chicken parts. Season the way you like it.
- Step 2: Bring to a boil.
- Step 3: Reduce heat to medium, cover the pot and let the contents simmer for about 15 to 20 minutes while making sure to turn chickens occasionally.
- Step 4: Further reduce the heat to medium low and let chicken cook for the times indicated in the table below, making sure to turn chickens occasionally.
- Step 5: Add broth as required when the current broth level has gone down: you don’t want dry chicken, you want moist and easy to shred chickens!
- Step 6: After cooking, check the internal temperature of the thickest part of the chicken and make sure it register 165 F or more. At this temperature, the chickens are fully cooked through and are safe to consume without the risks of salmonella infection. Other less reliable signs for doneness include white interior from previously pink flesh, and meat that easily shreds with fork by hand.
- Step 7: If chickens haven’t yet registered the temperature, cook for more minutes. You really can’t overcook chicken with the boiling method (in my own opinion)! And even if you do, you’re most likely going to purpose them in other recipes rather than eat them as they are.
- Step 8: Turn off the heat, let chicken rest in the pan to cool off( which will settle the juice within and bring all the flavors together).
- Step 9: Serve chicken (see how to do so in the latter section).
The basic recipe from above works with all parts of a chicken from bone-in to boneless breasts, thighs, drumsticks, giblets and even with a whole chicken. You just need some reasoning with the broth measurement, and also bear at the back of your mind that the cooking time varies according to whatever cut your cooking. You can use the table from the next section to estimate that.
Notes:
- In place of broth, you can use the same amount of water with one table spoon of melted butter or olive oil. You can also use stock cubes such as bouillon dissolved and mixed into similar cups or amount of boiling water. The ratio is typically one cube per cup of boiling water. You can scale up if you like using the same ratio. But make sure to ditch the salt when seasoning as these cubes tend to be saltier than normal low sodium broth. Another decent alternative is vegetable broth, but don’t forget the next point to create a more convincing alternative with it.
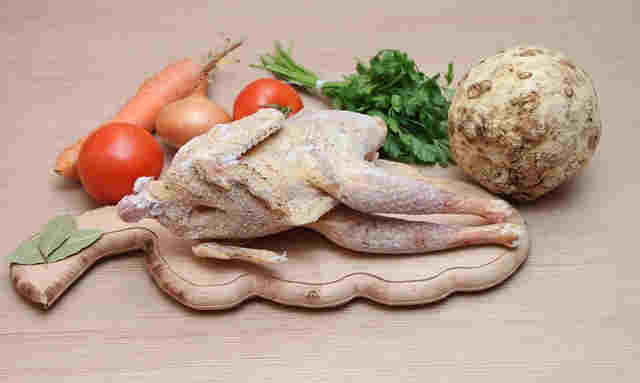
- For extra seasoning add garlic cloves, celery pieces, herbs, lemon juice, carrots pieces, onion wedges etc.
How long to boil frozen chicken?
Boiling from the frozen state automatically adds half the normal cooking time for room temperature cuts to the current cooking time.
So while you may still end up with chickens that taste just as good as their room temperature counterparts, they’ll take painfully longer to get done. An alternative would be to defrost them quickly in the microwave or in a cold water bath. How to do so is outlined in a latter section.
The table for cooking different types of chicken
| S/n | Chicken Part (regular sizes) | Estimated simmering time on a stovetop |
| 1 | Whole chicken (3 to 8) lb | 1 to 2 hours. |
| 2 | Whole chicken less than (25) oz | 35 to 50 min. |
| 3 | Halve bone-in skin-on chicken breast (6 to 8) oz | 35 to 45 min |
| 4 | Halve boneless skinless chicken breast (6 to 8) oz | 25 to 30 min |
| 5 | Breast quarters | 15 to 25 min. |
| 6 | Wings (2 to 3) oz | 35 to 45 min |
| 7 | Chicken Drummettes | 20 to 25 min. |
| 8 | Whole chicken leg (8 to 12) oz | 50 to 60 min. |
| 9 | Chicken thigh (4 to 8) oz | 40 to 50 min. |
| 10 | Chicken drumstick (4) oz | 40 to 50 min |
Quick notes:
- Size: Chicken smaller in size would cook much faster. i.e a less than 6 oz boneless chicken breast would cook much faster than the regular breast (6-8 oz) listed on the table. A good rule of thumb when it comes to nabbing the correct cooking time in this case would be to start checking for doneness at least 5 minutes before the estimated time above. Likewise, parts larger in size should also be allowed an extra 5 to 10 minutes (or more for even larger meat) on the pot for optimal doneness. Don’t be afraid of overcooking boiled-chicken, that term doesn’t exist (at least in most peoples cooking dictionary)!
- Cooking chickens faster: To cook chickens faster, cut them into small pieces (if you don’t mind) i.e. cut boneless breasts into fillets or tenders or culets. Estimate the cooking time by taking off a good 5 to 10 minutes from the total cooking time. Sometimes, we just fancy our chickens cooked whole, so in this case, you may need to defrost in the microwave and then cook immediately. This method melt off most of the ice and even start cooking some parts of the chicken.
How to thaw frozen chicken faster
1) Defrosting in the microwave
The microwave is the fastest and quickest way to thaw a chicken part. For the safest method possible, use the defrosting guidelines given by the manufacturer for that particular microwave. This might include the time for microwaving, the type of cuts, and the amount of chicken to do per session.
Here’s how to generally go about defrosting in the microwave
Auto defrost settings
- Use the programmed defrost setting if your microwave has one. Check the manual to learn how it works and for detailed instructions.
Manually
- Place the chicken whole or part in a microwave safe bowl. Take off any wrap or packaging on the chicken. Individual parts is generally recommended because whole chickens usually end up cooking from the outside even before the interior is thawed, but if you’re using the whole bird immediately and especially using the boiling method, that really shouldn’t be a problem!
- Cover the chicken with a microwave safe dish. Use the defrost setting on the microwave for two minutes. Make sure you’re microwaving parts one after the other or in a way that they don’t overcrowd in the microwave! Two small parts like the breasts is recommended at most.
- Add additional two minutes at a time and continually check the progress of the meat (look inside the cavity of whole birds for ice crystals). Make sure to periodically flip and move the chicken around in the microwave.
- Take out from the oven and boil immediately to 165F or more.
2) In cold water
- Place chicken (sealed in a vacuum-sealed bag, or leak-proof, zipper-top storage bag) in a bowl of cold water on the counter. Preferable, the chicken should be of small cuts.
- The water should be replaced after every 30 minutes to make sure it stays cool which will hasten the thawing process.
- Defrosting time will vary, but generally, small cuts like the chicken breasts should take less than 3 hours to defrost, with even small cuts taking lesser amount of time. Larger cuts or whole birds may take up to or even more than 9 hours to fully thaw.
What to do with the left over stock
After cooking, you’ll be left staring in a pot full of puke-like chicken broth, or whatever you ended up using. You can preserve it for future use in ramen or boiling, or discard it if you want.
Preserving? Here’s how to do it.
- Remove chicken and pass the broth through a sieve small enough to prevent larger bits from passing through with the liquid.
- Cool completely, place in a sturdy storage container, cover and put in the refrigerator for up to two days. For longer storage, consider freezer for up to two months. You can freeze them in cubes to use as flavor boosters. It’s fun that way.
Discarding?
- After removing the chicken, larger bits of seasoning and vegetables, pour the liquid down the drain and follow up with a 30 second hot water bath.
How to serve boiled chicken
With Salad
With Noodle
How to preserve boiled chicken
- Cool completely, then store in a storage container, cover and pop in the refrigerator for up to three days. For longer storage, consider freezing for up to two months.
And that’s it, we’ve made a tasty chicken piece by boiling on a stovetop!