
Mushrooms are gaining widespread popularity for their exotic taste which is actively dominated by the umami flavor, much like tasty Anura are gradually becoming an important staple across many cultures around the world.
And just like frogs, mushrooms are highly perishable commodities, and if left on the counter at ambient temperature cannot last a single day!
Deterioration and short shell life of mushrooms is easily accounted for by their high water content which favors dehydration, their high rate of respiration (yes, mushrooms breathe too), their unwanted microbial colonization by bacteria and fungi as well as the activities of enzymes which cause them to loose quality in no time.
But thankfully, all the above activities can be easily brought under control using a few techniques of preservation, and therefore mushrooms can be kept for longer duration around the house until when needed.
One such preservation technique is the “blanching then freezing”, and this article is all about it.
How to blanch mushrooms
Instructions:
- Pretreat mushrooms for color with a solution containing water and lemon juice.
- Drain mushrooms properly.
- Bring water to a boil and lower a steam basket loaded with even sized mushrooms.
- Steam for 5 minutes.
- Quickly remove the mushrooms and cool in ice loaded water.
- Properly drain, Package in a freezer safe bag and store in the freezer for up to 1 year.
The steps above are instructions for blanching mushrooms using the steaming method.
An alternative solution at home is to sauté, or even opt for the popular water blanching. The pros and cons of each methods are outlined in details in latter sections below, alongside a more detailed instruction on how to properly go about each method, including steam blanching.
Before we jump straight into that however, let us understand why treating mushrooms with heat is a necessary procedure for preserving their quality in the freezer.
Why blanch your mushrooms?
Blanching is a prerequisite to storing almost any kind of vegetable in the fridge, not just mushrooms, according to a vegetable freezing guide published by the University of Georgia.
If you’ve ever popped raw broccoli directly inside the freezer and ran into a horrible tasting, mushy textured or even a less colorful crown after thawing and purposing into a broccoli slaw, that’s the effect of lack of blanching you’re experiencing there.
With blanching, all these downside can easily be avoided or more appropriately, be easily brought under control by a great deal.
Here are the benefits of blanching mushrooms before freezing them:
- By blanching your mushrooms before freezing, you inactivate enzymes like the peroxidase and catalase which otherwise left, will cause the cap of the mushroom to deteriorate by losing color, texture, structure, and developing off tastes and flavors during freezing and also when thawing. In other words, blanching helps preserve the quality of mushrooms by a hype deal.
- Blanching cause the removal of intercellular gas from the tissues of the mushrooms which otherwise left, will cause an oxidation of the mushrooms (attainment of brown coloration), and also result in a mushroom that is less bright (among a few other things). Everybody likes their mushrooms bright and alive!
- Blanching helps to sterilize mushrooms by a great extent and also help clean their surface from dirt and pesticide residues. This is especially useful in preserving the shell life of mushrooms during refrigeration or thawing after freezing since bacteria like the spoilage bacteria if present on any surface, can resume activities during thawing and begin to cause the mushroom to deteriorate fast.
Blanching mushrooms just like any other process, has its own down sides too. But they’re not as significant as the advantages and so we’re not going to dedicate a special portion of this article for them.
The most important caveat to note about blanching mushrooms is to not over-blanch and under-blanch i.e. you should never subject mushrooms to any of these processes which will result into a serious problem; one that is far worse than storing raw mushrooms directly inside the freezer in the case of under-blanching.
When blanching mushrooms, it is necessary to keep to the exact blanching time in order to avoid excessive loss of flavor, color, vitamins, and minerals (especially during water heating) due to over-blanching, and an undesirable stimulation of more enzymatic activities which will result in a faster deterioration of the mushrooms than if they were not blanched due to under-blanching.
So you want to bear this at the back of your mind whenever you’re treating mushrooms for the freezer or for drying.
How to blanch mushrooms
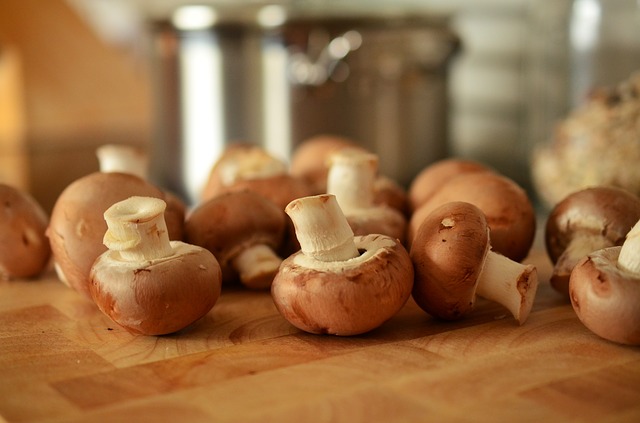
1) Choosing the right mushrooms
When blanching mushrooms, starting out with high quality specimens is just as important as any further process you’ll be observing along the line.
That’s because using quality mushrooms will preserve textural, structural, taste, and aesthetic qualities better. They will also preserve nutrients better which is the main goal of any preservation techniques after all.
So make sure to use mushrooms that are wound, spot and decay free, and are also at their peak freshness and flavor, so that the freezer would be more than happy to keep them fresher for you.
Remember, the freezer would only try as much as possible to keep produce the way you store them, and will not improve them in quality or taste.
2) Wash, trim, (cut) and grade mushrooms
Wash mushrooms in cold water using a soft brush or cloth to rid them off dirt. Proceed to trim off the ends of the stems and discard. Then, sort the mushrooms by size if you’re going to freeze them whole. This is crucial because blanching time is also a function of mushroom size, and ditching this process will leave you with some mushrooms under blanched while other are over blanched. You already know the consequences. If you like them halved, quartered or made into serving pieces, now is the time to cut them. This is advised if the mushroom in question is more than 1 inch across.
3) Choose the method of heat treatment
Steam blanching is the most recommend method for blanching mushrooms as it preserves water soluble solids or nutrients better (due to its less significant leaching effects). It also preserve ascorbic acid better than water blanching but not more than sautéing. Further, steam blanched mushrooms taste and texture the better then water blanched mushrooms after freezing and thawing, although they may not necessarily taste or texture better than sautéed blanching.
After steam blanching, sautéing is recommended for nutrient preservation. For better absorption of antioxidants and other compounds found in mushrooms, sautéing is probably the way to go because it incorporate oil or fat during the heating process which is speculated to improve such absorption. Then last is water blanching. But if for some reason, you unable to access the materials needed for any one or two of these methods, you can opt for the second or third alternative respectively.
Below, I’ll be providing the instructions for all heat treatments. First, let’s start with steam blanching.
Steam blanching for mushrooms
Instructions (as per the current recommendations of the Oregon State University Master Food Preserve Program)
Step one: Pretreat mushrooms for color by soaking them for 5 minutes in a solution containing 1 teaspoon of lemon juice to 470 ml of water.
Step two: Properly drain mushrooms in a colander.
Step three: Pour water halfway or (quarter) into a pot, lid, and bring to a boil on a stove top. Use high heat.
Step four: Put mushrooms in a single layer in a metal colander or a steamer basket and lower into the boiling water, making sure to give at least 3 inches space between the boiling water and the basket or the colander. Make sure you don’t overload the basket with mushrooms to allow for properly steam circulation.
Step 5: Lid the pot and steam the mushrooms for: 5 minutes if they are whole button mushrooms, 3 ½ minutes for quartered, 3 minutes for small dices or slices. Begin counting immediately the lid of the pot is on.
Step 6: After blanching, transfer mushrooms quickly into iced water (about 1 pound of ice for one pound of mushroom) and let sit for the same amount of time you blanched them. If you’re using cold water (other than running cold water from the tap), make sure its 60F or below, and maintain the temperature by changing the water frequently.
Step 7: Drain thoroughly after cooling. The mushrooms are now ready for packaging and storage in the freezer. Check the next section for that.
Sautéing for blanching mushrooms
Step one: Cook mushrooms until almost done (soft but not squishy) in a large skillet or frying pan drizzled with small amount of margarine, butter or oil. Use medium-high heat.
Step two: Transfer pan bottom into cold water and let mushrooms sit until cool. Alternatively, transfer mushrooms into a paper towel or plate and allow them to cool thoroughly.
Step three: The mushrooms are ready for packaging.
Water blanching for mushrooms
Instructions (as per the current recommendations of the University of Georgia)
Step one: Boil one pound of water in a large pot and lower one pound of prepared mushroom in a blanching basket into the water. Use high heat
Step two: Blanch for (steaming time divided by 1.5 amount of time i.e. 3 ½ minutes for whole button mushrooms, 2 ½ minutes for quartered, and exactly 2 minutes for sliced and diced mushrooms. Start counting as soon as the water resumes boiling – probably in a minutes time.
Step three: Remove basket from water and submerge in an iced water. Or, place under cold running tap water, use cold water at or below 60 F and replace frequently to maintain temperature.
Step 4: Drain thoroughly after cooling. The mushrooms are ready for packaging.
How to freeze blanched mushrooms
Place mushrooms in a single layer on shallow trays or pans. Pop in the freezer until the mushrooms turn firm. The remove them immediately and place them freezer labeled containers such as plastic freezer bags or containers. Press out as much air as you can from flexible bag and pack tightly in the case of rigid containers. Make sure to leave ½ inch head space at the top of rigid containers and flexible bags. Label the bag with the product name, product type (i.e. blanched mushrooms), present date and expected thaw or use date. Freeze immediately.
The method above is known as tray pack and it allows for mushrooms to freeze without forming into a block which will normally present headache during use.
An alternate method is to dry pack them, i.e. freeze them directly instead of doing the extra work of freezing on a try and then transferring into storage containers. The instructions are the same as outlined for the tray pack. Also, when using this method, make sure to use containers with wide mouth jars which will facilitate easier removal of mushrooms.
How to use frozen mushrooms
When it’s time to use frozen mushrooms, allow them to thaw in the refrigerator first before cooking. Or, you can use them from the frozen state but allow up to 50 percent addition in cooking time.
Frozen mushrooms are best suited for dishes that require cooking such as casseroles or stews. They will taste best while hot rather than cold.
How to refrigerate blanched mushrooms
Blanched mushrooms can be put in the refrigerator and stored for a maximum of one week.
