
Just as you can place a “crazy corn” with its shuck (excuse the language but that’s what corns on the cob are called in some American communities) in a pot of simmering water to boil until tender, you can also wrap it with a layer of aluminum foil and carefully toss into the freezer for as long as you wish.
Except this time, flavor enhancement isn’t the motive. The tossing is solely for storage and quality preservation.
Below, i’ll teach you how to properly freeze a corn on the cob with its husk on. Without wasting time, let’s get started.
How to freeze corn on the cob with husk on
Instructions:
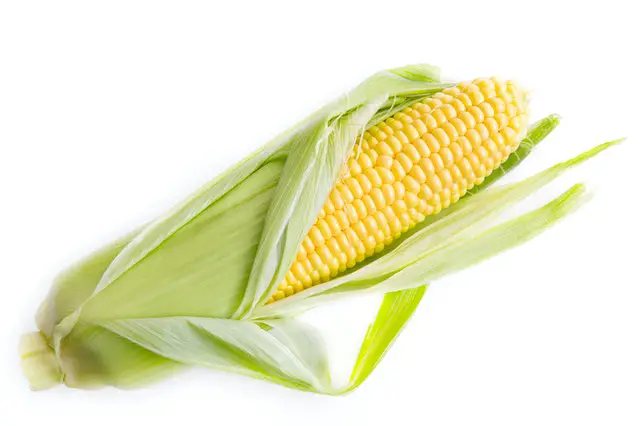
- Choose the perfect corn on the cob with its husk on.
- Blanch the corn in a pot of boiling water for 7 to 9 minutes depending on the size of the corn, and cool immediately in an iced water for as long as the corn was blanched for.
- Dry the corn thoroughly using a paper towel, and also by holding it from the fatter end and shaking vigorously.
- Package the corn with its husk on in a freezer plastic bag and suck out as much air as much as you can.
- Place the corn in the freezer and store for up to 8 months.
The steps above are a brief excerpt. For the full package on how to properly freeze your corns on the cob with their fresh husks on – learning the importance of each step along the way as well as knowing what step is recommended and what is optional, keep reading until the very end.
The steps in full: How to properly freeze corn on the cob with the husk on
1) Choose the right corn
As with every vegetable or food item, starting out with quality is the best way to end up with quality, whether you intend freezing, cooking or processing the food item into intermediary forms. The maize, too, is no exception in this regard.
When picking out individual corns for freezing, make sure they have a good color of green on their husks. Make sure the kernels are plump, and not too mature, and make sure (if the final corns are meant for grilling or roasting), that you’ve got a sweet corn variety at hand. Going in the reverse order of this listing, i’ll explain what i mean by each of the warnings in details.
First, corns with a fresh colored husks usually indicate a vegetable that is of good quality. These usually have fresh silk; the spaghetti like component of the ears that bulge out from the tapered end of the husk, that is free from decay or worm injury. And they also, often have stems that are neither faded nor dried.
They look the most fresh in the eyes, texture the softest on the tongue, and smell the freshet when inhaled. If you manage to fulfil the above criteria with your corns meant for freezing, then you at least have a corn that is readily edible after freezing. For the best tasting corn however, you want to pay attention to not only the external features, but the inside ones as well.
Corns having kernels that are plump (which usually mean they’ve not attain full physiological maturity yet), often freeze the best and cook nicely for consumption. That’s because they have a significant amount of sugar in them which will take forever to convert into starch in the chilly perimeters of the freezer, that’s even without blanching.
With blanching, all enzymatic activities are stopped, and so the corn basically maintains its current state in the freezer for a very long time. Corn kernels that are pulp maintain their sweetness in the freezer by a manageable degree unlike the way fresh corn struggles to keep sweetness on the counter even for a single day.
Third, is to consider a sweet corn variety for freezing. But that’s when the after freezing purpose of the corn is for direct consumption. If you’re purposing the corn into other intermediary forms such as corn syrup or powder first, you won’t notice the difference as much.
Other types of corn varieties just don’t keep sweetness as much as sweet corns do, because they’re never studded with as much sugar compounds in the first place. So the little they have easily turns into starch along the way even while freezing.
One more thing, if you just plucked the fruits from the garden, you want to blanch them as fast as possible otherwise the sugar components in the will quickly convert into starch and you’ll end up losing most of the sweetness in as little as a day.
2) Blanching
The next step after choosing the right corn is to blanch. Because there’s no quality preservation without blanching. The process is so crucial for keeping texture, structure, flavor and taste, and it also helps with color too, sometimes even enhancing it.
Blanching doesn’t only stop the quick deterioration of corns while they freeze, it also helps to rid them off any surface organisms that may be present on them, and it also helps remove any dirt on the husks as well as any pesticide residue that may have been carried. So blanching is a perquisite for keeping corns fresh during freezing.
A word of warning though. While blanching, you want to be extra careful not to under do it or overdo it. They each have their side effects and neither is likeable. Under-blanching cause quick deterioration of the corn by activating and exciting more enzymes which are responsible for these.
Over-blanching on the other hand, leads to loss of desirable qualities such as texture, taste, color, structure etc. The sweet spot is that which is nestled perfectly in between, and that’s what you should always aim for. Don’t worry though, I’ve got you covered with the perfect blanching guide for every size of corn you might have. So stick to it and you’re safe to go.
How to blanch corn on the cob with husk
- Clean corns on the cob with the husks under running water.
- Trim out the silks.
- Bring water to a boil in a large sauce pan or pot.
- Place the corns inside the pot and let the water return to a boil. Cover the lid while you wait.
- Blanch for 7 minutes if the corn ears are small sized, 9 minutes if they are medium and 11 minutes if they are large. Make sure to start counting the very moment the water returns to a boil.
- Remove the corns from the pot and quickly transfer them into an iced water for as much time as you blanched them. They should be cool when you take them out of the water.
- Thoroughly dry them with a paper towel.
Now you’re ready for packaging and freezing.
3) Freezing
Wrap corns in a freezer foil or film and pack tightly into a wrapper (like those made out of plastic), and make sure to remove as much air as you can. You can ditch the foil or film if you like since you’re freezing with the husks anyway.
The extra protection is to prevent freezer burn. After packing, label the bag with the name of the item, it’ current state i.e. blanched, and expected date of use.
Pop in the freezer and store for up to 8 months — according to a publication called Preserve the harvest, issued by the Utah State University Cooperative Extension.
How to thaw corn on the cob with husk
Thaw corn in the cob with husk in the refrigerator a day before use. Alternatively, run them under cold water until they defrost. Shuck and use as required.
How to refrigerate corn on the cob with husk
We’ve discussed freezing of corn in their husks, but refrigerating them is also a possibility. But they usually don’t last nearly as long. Some 2 to 3 days and the spoilage activities kick in. So you want to make sure you use them before this time frame.
To refrigerate a corn in the cob in its husk, there’s no need to wrap it in a foil, film or bagging it in a wrapper. The shuck is more than sufficient to keep the corn fresh.
So just go ahead and place it on a rack, away from any thawing meat drips, and also from climacteric fruits such as apples and bananas since they emit ethylene gas which can speed up the enzymatic activities of the maize and cause them to spoil much quicker.
